This post may contain affiliate links. Read my full disclosure policy.
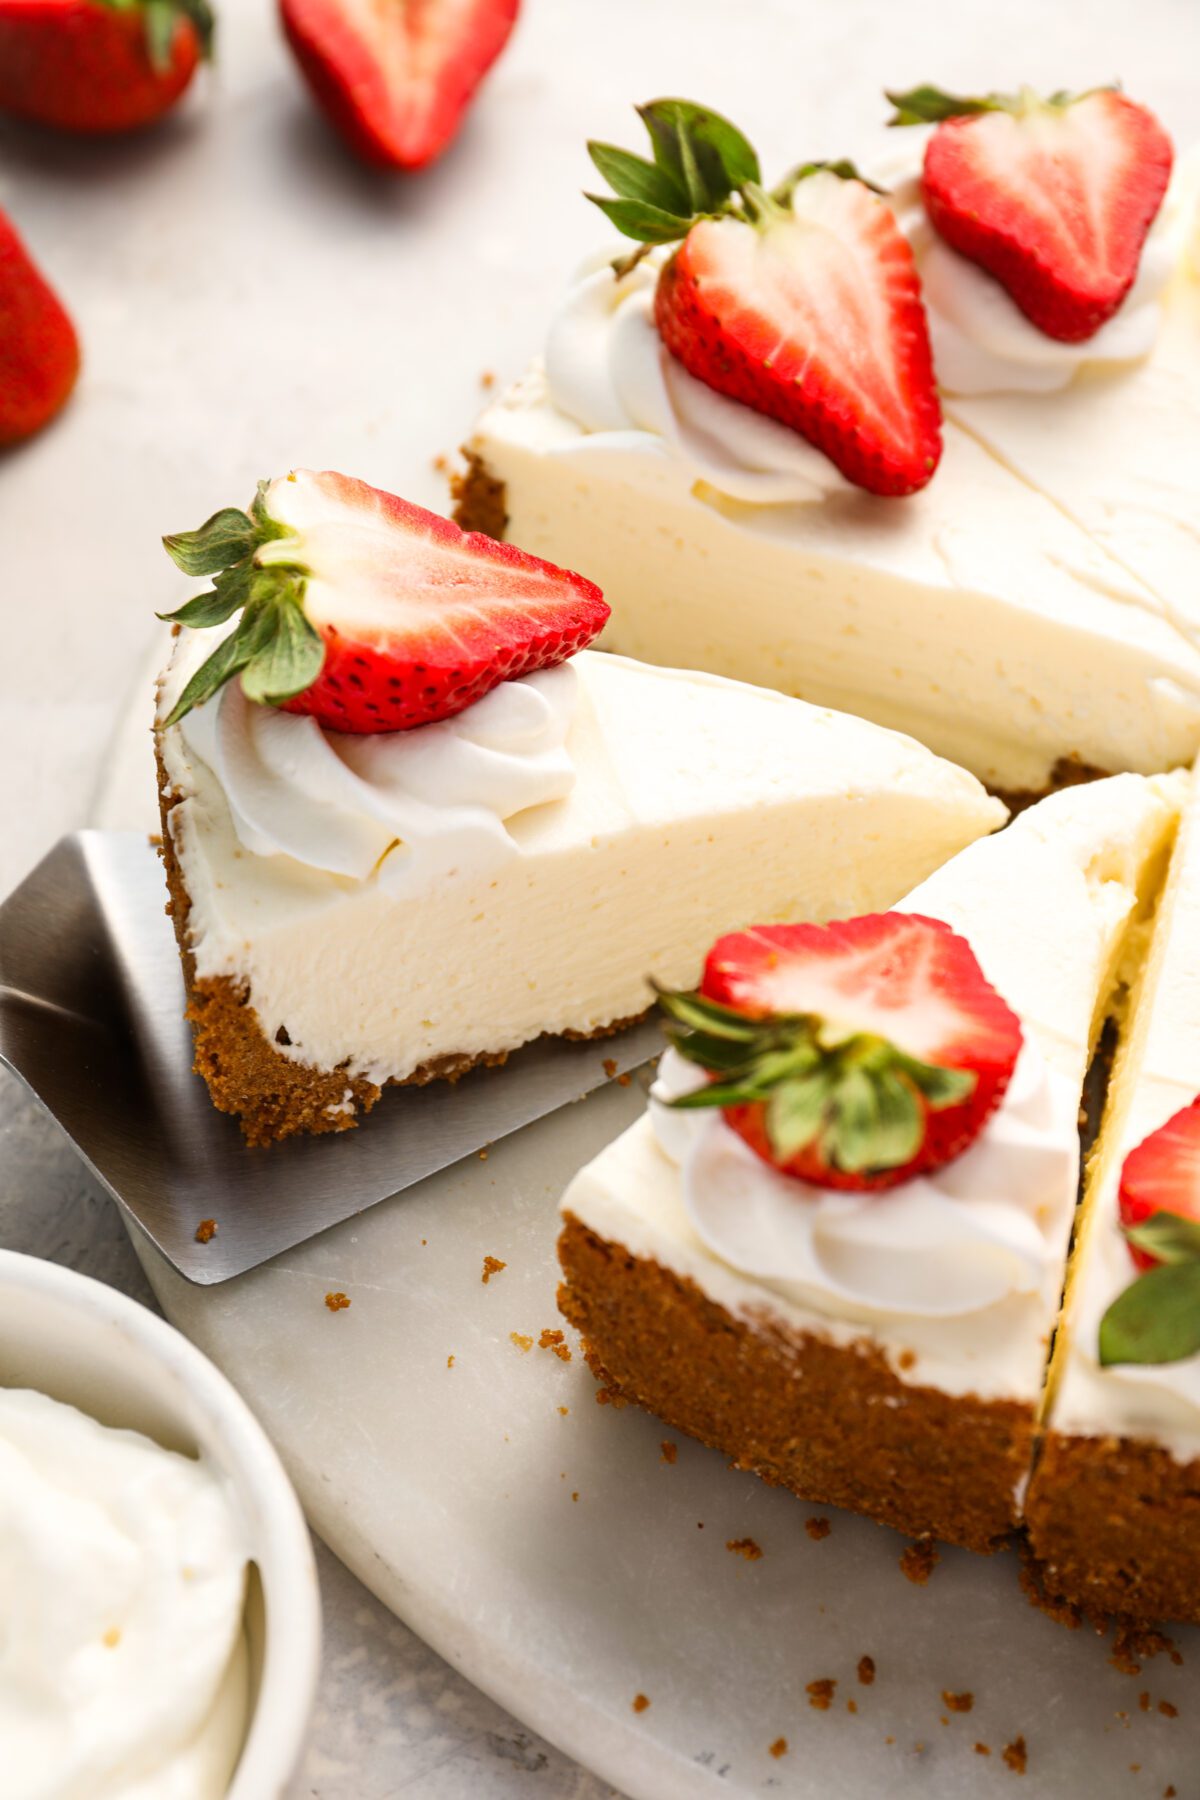
No baking, no water bath, no cracks—this easy no-bake cheesecake is cool, lusciously creamy, and always a hit. Perfect for warm weather or when you just don’t feel like turning on the oven.
There’s something about cheesecake that feels celebratory—and this no-bake cheesecake recipe delivers all the goodness with none of the fuss. With a buttery cookie crust and a creamy, whipped filling, it’s easy to pull together (no water bath or oven required) and perfect for prepping ahead. You can refrigerate it up to 2 days in advance or freeze it for up to 3 months.
I use Biscoff cookies for the crust instead of the usual graham crackers—their caramelized flavor and crisp texture make for a richer, more flavorful base that holds up beautifully without baking. You can substitute graham cracker crumbs if you’d like, but the flavor doesn’t have that same caramelly richness. Serve the cheesecake plain, top it with fresh berries and whipped cream, or drizzle it with berry sauce or caramel sauce.
What You’ll Need To Make No-Bake CheeseCake


- Biscoff Cookie Crumbs: These spiced cookies give the crust a buttery, caramelized flavor and crisp texture. You’ll need 2 cups of crumbs—about two 8.8-oz packages, though only 10 cookies from the second package. Pulse in a food processor or crush in a zip-top bag with a rolling pin until finely ground.
- Butter: Helps bind the crust together and also adds rich flavor and a tender crunch.
- Sugar: Adds a little sweetness to both the crust and filling to round out the tangy and creamy notes.
- Heavy Cream: Whipped and folded into the filling to lighten the texture and make it fluffy and mousse-like.
- Cream Cheese: The primary ingredient in the filling—rich, tangy, and ultra-creamy when whipped smooth. (Use Philadelphia brand for best results.)
- Lemon Juice: Adds a hint of acidity that brightens the filling and keeps it from feeling too heavy and one-note.
- Vanilla Extract: Adds warm, aromatic flavor to the filling.
- Jump to the printable recipe for precise measurements
Step-By-Step Instructions
Step 1: Make the crust. In a medium bowl, stir together the Biscoff crumbs, melted butter, and sugar. You’re aiming for the mixture to resemble wet sand—this ensures the butter is evenly distributed and the crust will hold together well after chilling.


Step 2: Form the crust: Press the mixture into a 9-inch springform pan using your fingers and the bottom of a dry measuring cup, forming a crust that’s about ¼-inch thick and goes 1½ to 2 inches up the sides. Pop the crust in the freezer to set it while you make the filling.


Step 3: Whip the cream. In the bowl of an electric mixer fitted with the whisk attachment (or beaters), whip the cold heavy cream on medium-high until medium-stiff peaks form, about 4 minutes. Scoop it into a separate bowl and set aside—no need to wash the mixing bowl.
Pro Tip: If you have a few extra minutes, chill the bowl and beaters in the fridge for a few minutes before whipping the cream; this makes for faster whipping and more stable peaks.


Step 4: Make the filling. In the same mixing bowl (this time with the paddle attachment or beaters), beat the cream cheese, sugar, lemon juice, vanilla, and salt until smooth and creamy, about 2 minutes. Scrape down the bowl as needed. Beating it well at this stage helps dissolve the sugar and incorporates air for a lighter texture.
Add about a third of the whipped cream to the cream cheese mixture and mix on low until combined—this lightens the base, making it easier to fold in the rest without deflating the mixture. Then gently fold in the remaining whipped cream with a spatula until fully blended. Don’t overmix; you want the filling to stay light and airy.


Step 5: Fill and chill. Spread the filling evenly into the chilled crust using an offset spatula. Cover with plastic wrap and refrigerate for at least 6 hours. When you’re ready to serve, remove the sides of the springform pan. Slice into wedges with a sharp knife, rinsing the blade under hot water between cuts (this gives you neat, clean slices without dragging through the filling).


Video Tutorial
More No-Bake Desserts You May Like
No-Bake Cheesecake


This no-bake cheesecake is a fuss-free dessert that looks beautiful, tastes incredible, and couldn’t be easier to make.
Ingredients
For the Crust
- 2 cups Biscoff cookie crumbs (you’ll need two packages; see note)
- 7 tablespoons unsalted butter, melted
- 2 tablespoons sugar
- ⅛ teaspoon salt
For the Filling
- 1¼ cups heavy cream
- 16 oz cream cheese, at room temperature
- ¾ cup granulated sugar
- 1 tablespoon fresh lemon juice, from 1 lemon
- 1 teaspoon vanilla extract
- ⅛ teaspoon salt
Instructions
For the Crust
-
In a medium bowl, combine the Biscoff crumbs, butter, and sugar.
-
Using your fingers and the bottom of a dry measuring cup, press the crust into a 9-inch springform pan, aiming for an even ¼-inch thickness all around and extending 1½ to 2 inches up the sides. Place the crust in the freezer to set while you prepare the filling.
For the Filling
-
Using an electric mixer fitted with the whisk attachment or beaters, whip the cold heavy cream on medium-high speed to medium-stiff peaks, about 4 minutes. Transfer the whipped cream to a bowl and set aside. No need to clean the mixing bowl.
-
In the same bowl, using the paddle attachment or beaters, beat the cream cheese, granulated sugar, lemon juice, vanilla, and salt on medium speed until perfectly smooth and creamy, about 2 few minutes, scraping down the sides of the bowl with a rubber spatula as needed.
-
Add ⅓ of the whipped cream to cheesecake filling and mix on low speed until combined. Using a rubber spatula, fold in the remaining whipped cream until evenly combined. Do not overmix.
-
Take the crust out of the freezer and use an offset spatula to spread the filling into the crust. Cover tightly with plastic wrap and refrigerate for at least 6 hours or up to 2 days.
-
Remove the sides of the springform pan. Cut into wedges with a sharp knife, rinsing the knife under hot running water between slices. Serve the cheesecake directly from the base of the pan.
Notes
Freezer-Friendly Instructions: The cheesecake can be frozen for up to 3 months. To freeze, place the cake in the freezer briefly, unwrapped, to firm it up. Then double-wrap it tightly with aluminum foil or plastic freezer wrap, or place it in heavy-duty freezer bag. Thaw in the refrigerator the night before you plan to eat it.
Note: To make the cookie crumbs, pulse the cookies in a food processor until finely ground. If you don’t have a food processor, place them in a zip-top bag and crush them with a rolling pin or the bottom of a measuring cup until you get fine, even crumbs. You’ll need two 8.8 oz packages of cookies, but only about 10 cookies from the second package to reach 2 cups of crumbs.
Nutrition Information
Calories: 616kcalCarbohydrates: 53gProtein: 6gFat: 44gSaturated Fat: 23gCholesterol: 101mgSodium: 390mgFiber: 2gSugar: 36g
This website is written and produced for informational purposes only. I am not a certified nutritionist and the nutritional data on this site has not been evaluated or approved by a nutritionist or the Food and Drug Administration. Nutritional information is offered as a courtesy and should not be construed as a guarantee. The data is calculated through an online nutritional calculator, Edamam.com. Although I do my best to provide accurate nutritional information, these figures should be considered estimates only. Varying factors such as product types or brands purchased, natural fluctuations in fresh produce, and the way ingredients are processed change the effective nutritional information in any given recipe. Furthermore, different online calculators provide different results depending on their own nutrition fact sources and algorithms. To obtain the most accurate nutritional information in a given recipe, you should calculate the nutritional information with the actual ingredients used in your recipe, using your preferred nutrition calculator.

